Kitchen Pantry Makeover
- Peyton Bryan
- Oct 21, 2020
- 3 min read
Updated: May 11, 2021

It's funny how home projects start. It begins with a little idea or even a complaint and the next thing you know we are finding a solution and in the middle of a full blown makeover. Thats how this started, with a little baby complaint about having no where to put my cookbooks. Ive always loved to bake and my collection of cookbooks have slowly grown with no where to go.
Our kitchen pantry had wired shelves which is pretty common in closets and pantry areas, but they weren't very efficient. The openings in the shelves were wide enough that I couldn't set anything smaller than a cereal type box on them and half of my cookbooks were thin and could easily fall through. Not to mention, they were only about 12 inches deep. I mentioned it to Adam and he thought of a great idea to build larger, deeper, solid shelves and suggested the beadboard backing that we both love so much. The next thing I knew we were at Home Depot. We should own stock in Home Depot. If we aren't at home there is a 50/50 chance you will find us at home depot lol. Its basically one of our favorite places. So after buying all of the supplies, we went home and got started on our weekend project. This is what we bought for the pantry, but yours will vary based on the size and how many shelves you do.
SUPPLIES:
Beadboard backing sheets (We bought 4)
2x2's to build the frame work for the floating shelves
1/4" sheets of Lauan Plywood for the top and bottoms of the shelves
1x2 trim to trim out everything when we were finished
Dewalt nail gun
Dewalt Drill
pocket screws
Kreg Pocket Hole Jig
Wood glue
Table saw
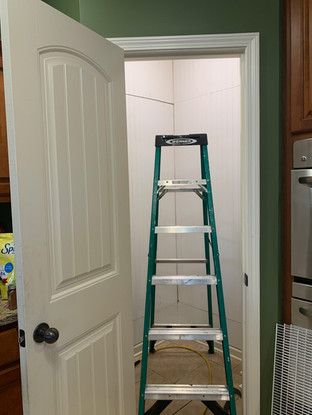
We decided to do slightly larger openings around 13 inches tall and add an extra shelf towards the ceiling for things that are too large to store in cabinets like my tiered trays and overflow of platters and drink dispensers. We started (and by we I mean Adam) by ripping out the wired shelves. ( I did help take them to the garage though) Then, he cut the beadboard for the walls. It only comes in 8 foot pieces and we have 9 foot ceilings so he measured and cut it at the height where the shelves would cover the seams and used his nail gun to secure it.


The first picture below shows a hole where a previous owner or the builder added a light as an afterthought. It was a strange placement and didn't give off much light plus it was wired to a completely separate switch on the wall. We chose to take it down and cover the opening with beadboard. Adam added a recessed light centered in the top of the pantry ceiling that gave us more light, making it look brighter and cleaner.


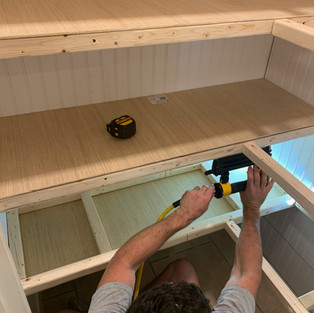
Then, he started on the floating shelves. They are built using 2x2's to create two separate frames that are put together, then drilled into studs in the wall. He used a Kreg pocket hole jig to secure them into studs in the wall. Then, he added 1/2" Lauan Plywood to the top and bottom. He secured the plywood with wood glue and a nail gun.


After all of the shelves were put together he added 1x2 trim on the outside of the shelves. I caulked all of the seams on the top and bottoms of the shelves and ceiling and base board where the beadboard met, then painted everything in Behr Papier Blanc to match our white trim throughout the house.


Overall, I feel like this was a huge success. It was our first time doing floating shelves and they turned out fantastic PLUS my cookbooks now have a happy place to sit on the shelf. Not only is it cleaner and easier to organize, but the pantry feels so much bigger. I feel like Im falling in love with our house one project at a time and even though this was a little space it definitely made a huge impact on our kitchen as a whole.
Now on to the next project...
Thank you for following us as we makeover our Marion home and share tips and tricks along the way. If you have any questions, feel free to reach out and connect with me @brittanypeytonbryan